Introduction
Following tutorial help you install Apache, Maria-db, PHP and phpMyAdminPrerequisite
Launch Ec2 Instance of Amazon LinuxAllow Following PORT
80 - http
22 - SSH
443 - https
If port are not allowed follow instruction else ignore it.
Add a security rule to allow inbound HTTP (port 80) connections to your instance if you have not already done so. By default, a launch-wizard-
N security group was set up for your instance during initialization. This group contains a single rule to allow SSH connections.Open the Amazon EC2 console at https://console.aws.amazon.com/ec2/.
Choose Instances and select your instance.
Under Security groups, choose view inbound rules.
You should see the following list of rules in your default security group:
Security Groups associated with i-1234567890abcdef0
Ports Protocol Source launch-wizard-
N22 tcp 0.0.0.0/0 ✔
Using the procedures in Adding Rules to a Security Group, add a new inbound security rule with the following values:
Type: HTTP
Protocol: TCP
Port Range: 80
Source: Custom
Install LAMP
Update Your System
- Connect Your instance
$ ssh -i "path/to/your/private/pemfile.pem" ec2-user<publicdns or IP>
2. Insure that, all packages are upto date.
[ec2-user ~]$ sudo yum update -yInstall Apache, PHP and MySQL using YUM command
1. First install mariadb and Amazon Linux repository for latest package of PHP, and mysql.
[ec2-user ~]$ sudo amazon-linux-extras install lamp-mariadb10.2-php7.2
[ec2-user ~]$ sudo yum install -y httpd php mariadb-server php-mysqlnd
Configure APACHE Web Server
1. Start Web Server
[ec2-user ~]$ sudo systemctl start httpd
2. Allow Apache Web Server start at boot time automatically.
3. Verify httpd, running at boot or not use the following command
4. Test your web server. In a web browser, type the public DNS address (or the public IP address) of your instance.
If you are unable to see the Apache test page, check that the security group you are using contains a rule to allow HTTP (port 80) traffic.
[ec2-user ~]$ sudo systemctl enable httpd3. Verify httpd, running at boot or not use the following command
[ec2-user ~]$ sudo systemctl is-enable httpd4. Test your web server. In a web browser, type the public DNS address (or the public IP address) of your instance.
Modify Permission of /var/www/html folder of Web Server
Apache Server file which kept in /var/www/html folder this is called root folder and this is owned by root user. Allow the ec2-user account to manipulate files in this directory, you must modify the ownership and permissions of the directory.
[ec2-user ~]$ ls -l /var/www
total 16
drwxr-xr-x 2 root root 4096 Jul 12 01:00 cgi-bin
drwxr-xr-x 3 root root 4096 Aug  7 00:02 error
drwxr-xr-x 2 root root 4096 Jan  6  2012 html
drwxr-xr-x 3 root root 4096 Aug  7 00:02 icons
drwxr-xr-x 2 root root 4096 Aug  7 21:17 noindex
Add the ec2-user user to the
apache group, to give the apache group ownership of the /var/www directory and assign write permissions to the group.
To set file permissions
- Add your user (in this case, ec2-user) to the
apachegroup.[ec2-user ~]$sudo usermod -a -G apacheec2-user - Log out and then log back in again to pick up the new group, and then verify your membership.
- Log out (use the exit command or close the terminal window):
[ec2-user ~]$exit - To verify your membership in the
apachegroup, reconnect to your instance, and then run the following command:[ec2-user ~]$groupsec2-user wheel apache
- Change the group ownership of
/var/wwwand its contents to heapachegroup.[ec2-user ~]$sudo chown -R ec2-user:apache /var/www - To add group write permissions and to set the group ID on future subdirectories, change the directory permissions of
/var/wwwand its subdirectories.[ec2-user ~]$sudo chmod 2775 /var/www[ec2-user ~]$find /var/www -type d -exec sudo chmod 2775 {} \; - To add group write permissions, recursively change the file permissions of
/var/wwwand its subdirectories:[ec2-user ~]$find /var/www -type f -exec sudo chmod 0664 {} \;
To test your LAMP web server
If your server is installed and running, and your file permissions are set correctly, your ec2-user account should be able to create a PHP file in the
/var/www/html directory that is available from the internet.- Create a PHP file in the Apache document root.
[ec2-user ~]$echo "<?php phpinfo(); ?>" > /var/www/html/phpinfo.php - In a web browser, type the URL of the file that you just created. This URL is the public DNS address of your instance followed by a forward slash and the file name. For example:
http://my.public.dns.amazonaws.com/phpinfo.phpYou should see the PHP information page:
To secure the database server
- Start the MariaDB server.
[ec2-user ~]$sudo systemctl start mariadb - When prompted, type a password for the root account.
- Type the current root password. By default, the root account does not have a password set. Press Enter.
- Type
Yto set a password, and type a secure password twice. For more information about creating a secure password, TypeYto remove the anonymous user accounts.
- Type
Yto disable the remote root login. - Type
Yto remove the test database. - Type
Yto reload the privilege tables and save your changes.
- Use chkconfig command to on MySQL server to start at every boot.
[ec2-user ~]$sudo systemctl enable mariadb
Install phpMyAdmin
phpMyAdmin without SLS/TLS in Apache is not recommended, it is very insecure.
- Install the required dependencies.
[ec2-user ~]$ sudoyum install php-mbstring -y - Restart Apache.
[ec2-user ~]$ sudo systemctl restart httpd - Navigate to the Apache document root at
/var/www/html.[ec2-user ~]$cd /var/www/html[ec2-user html]$ - Select a source package for the latest phpMyAdmin https://www.phpmyadmin.net/downloads. and installed it.
[ec2-user html]$wgethttps://www.phpmyadmin.net/downloads/phpMyAdmin-latest-all-languages.tar.gz - Extract the package and change the name of the resulting directory to something more manageable.
[ec2-user html]$tar -xvzfphpMyAdmin-latest-all-languages.tar.gz[ec2-user html]$mvphpMyAdmin-4.7.5-all-languagesphpMyAdmin - In a web browser, type the URL of your phpMyAdmin installation.
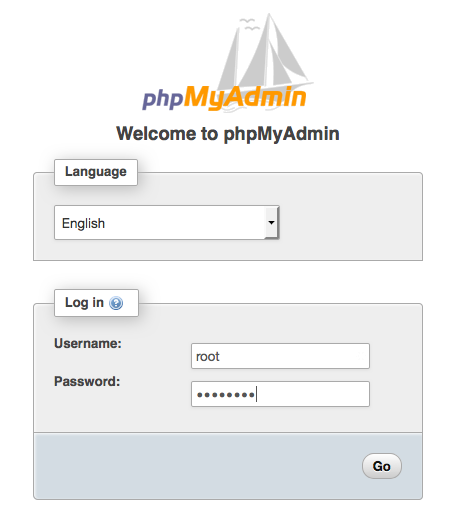
http://my.public.dns.amazonaws.com/phpMyAdminYou should see the phpMyAdmin login page:


No comments:
Post a Comment